Step-by-step guide on how to integrate your QuickBooks Online account.
You can integrate your Marketplace Management account with your QuickBooks Online account. We understand QuickBooks has several options within their platform that help you manage your taxes and your payments.
Our integration is very straightforward and it is easy to set up, however. Once integrated, we will automatically send your order information to QuickBooks.
Quick points:
- We do not import available quantities from QuickBooks to Marketplace Management.
- Marketplace Management is built to be the quantity source for your catalog. We will import your quantities when your sales channels are integrated.
- We can only send order information to a single account folder.
- For example, we will send all orders (Amazon, eBay, Walmart, etc.) to the same account, and you cannot split up the invoices/sales receipts into different accounts.
- If you are looking for more Marketplace Management information on reaching QuickBooks, that would be considered a Feature Request and you can submit requests here.
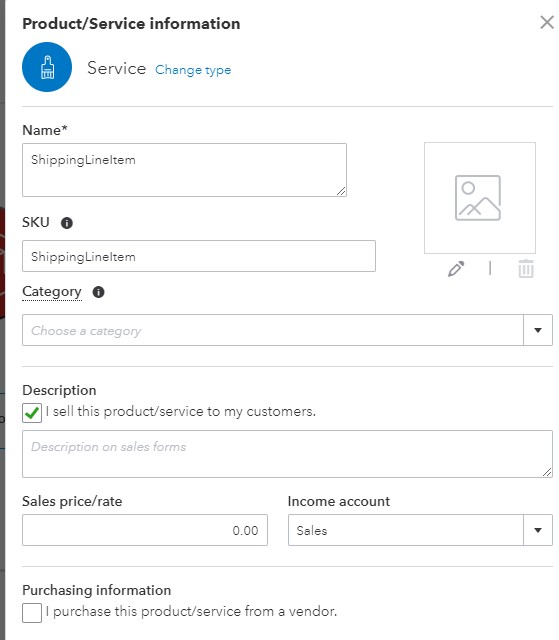
- If you want to send your Shipping price to QuickBooks Online then you will need to create a separate service for Shipping within your account. You will add a service called "ShippingLineItem".
- There is a screenshot of what the service will look like near the end of this article.
- We default to QuickBooks in order to assign the sales tax to your orders. You must have your Tax options established prior to integrating in order for that value to be assigned to your orders.
This guide is strictly for integrating your account with QuickBooks Online. If you wish to see what specifically is sent to QuickBooks, please review these articles:
How to integrate your QuickBooks Online account
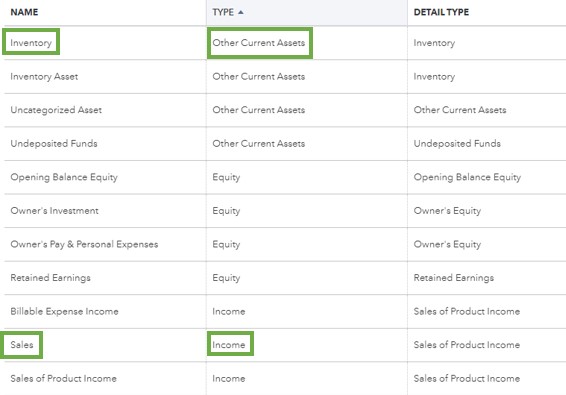
- The first step is confirming which account you want your orders to be sent to. You will select an Asset, Income, and Cost of Goods Sold account from within your QuickBooks account.
You will find your account options within QuickBooks under Accounting -> Chart of Accounts:

Here is what the page will look like:
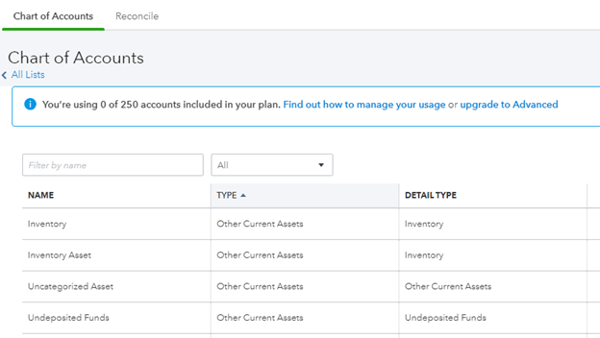
You will find your examples within this list. If you are brand new to QuickBooks Online, you might have little to no accounts created yet, and you will want to create those PRIOR to integrating with Marketplace Management.
Here is a highlighted example where we have chosen the accounts to send orders too:
2. After you have created your accounts (or you have chosen the accounts you want to use), you will enter those within Marketplace Management. Here is where you will enter that information, (Settings -> Integrations -> QuickBooks) under the "Account Names" tab:
-2.png?width=600&name=image%20(10)-2.png)
3. After you have entered your account names, make sure to establish your Sync rules. The more sales channels or carts you have integrated within Marketplace Management, the more options will appear under "Integrations":
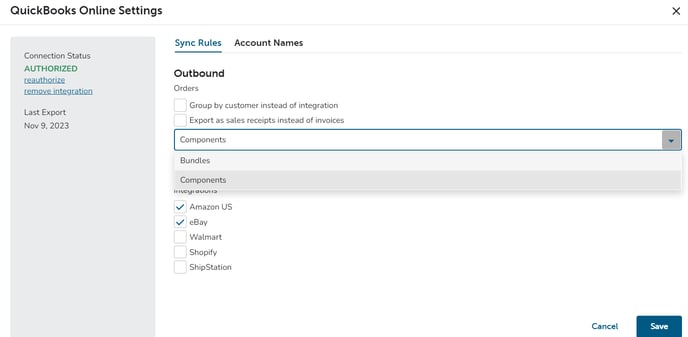
4. That is all you need! Once the settings are established we will begin feeding orders to your QuickBooks account.
How orders are sent to QuickBooks Online
- You can choose to send orders as an Invoice or a Sales Receipt.
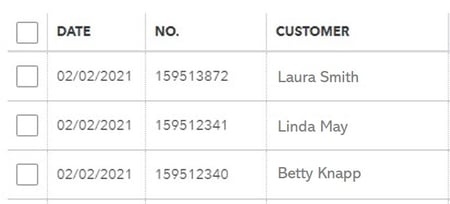
- You can also send the orders with the integration as the customer name:
(Group by customer instead of integration = OFF)
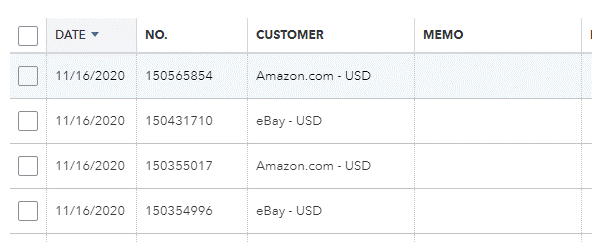
Or as the customer themselves (if the customer purchases more than once, additional customer logs will not be created):
(Group by customer instead of integration = ON)
- If you want to send your Shipping price to QuickBooks Online then you will need to create a separate service for Shipping. You will add a service called "ShippingLineItem".
Once created, shipping prices will automatically be attached to your orders.
- Marketplace Management will not override or duplicate previously created orders.
- Our Support Team can prompt for orders to be resent to QuickBooks if needed (for example if specific settings were changed after the integration was established).